Wednesday, 27 August 2014

Make a Wish Card

Hello again, 

Well that's four cards in four days this week - I'd like to think that I've just been struck with a huge amount of energy and creativity but sadly I think I'm just tryong to avoid revising for my exam next month. Oh well, I'm enjoying myself anyway! This card was made for the Lawnscaping Challenge No. 88 - Texture. For the inspiration for this card I went back to my childhood days of playing with My Little Pony (all you 80s kids will know what I mean!) and used pretty pastels and images from the Critters Ever After stamp set from Lawn Fawn. I used textured watercolour card stock, smooth acetate and fluffy silk parchment to add a variety of textures to my design - Enjoy!


My card base was a white notecard from Papermania. I next used the Femme Frames die set from Mama Elephant to cut the front of a powder blue Hero Arts notecard and a piece of Ranger watercolour cardstock into layers. I then created a aperture in the front layer to allow a watercolour rainbow river to peek through. To create this a used Worn Lipstick, Mustard Seed and Peacock Feathers distress inks and plenty of water to create a watercolour wash on another piece of watercolour card stock. I love how the ink did the work for me and created all the colours inbetween with no effort at all from me. I dried this with my heat tool and then splashed clean water over the top. The distress ink reacted with the water a second time to create a watermarked texture. Once this had dried again I wasn't happy with how bright the colours were so I overlayed this with a piece of acetate to create a more pastel look which was much more in-keeping with my design. I adhered this behind the aperture window. The front of the aperture was created with acetate for a contrasing texture the rough watercolour cardstock.
Next I cut a number of cloudy shapes from silk parchment. I've had this in my stash so long I can't even remember where I got it from but I was so pleased to finally be able to use it. To make the clouds look extra fluffy I distressed the edges slightly with my Stampin' Up distress tool. I adhered them to the card with silicone glue to create lots of dimension.
The unicorn image is from the Critters Ever After stamp set from Lawn Fawn. I stamped it onto watercolour cardstock using Hero Arts Charcoal mid-tone ink, for a softer look than my usual black ink. I used Spectrum Noir pencils, paper stubs and blending solution to create smooth shading. I then used a Uniball white gel pen to add freckles. I used the Zig Wink of Stellar clear glitter pen to add sparkle to the mane and tail and Ranger Glossy Accents to add shine to the horn and hooves. Again I adhered this to the card with Silicone glue.
I stamped the Make a Wish sentiment, also from the Critters Ever After Stam set with the charcoal ink. I added lots of tiny star stamps using the three colours of distress ink and flicked clean water over the card to allow them to blend a little. I also masked off the centre of my card and flicked watered down versions of the three ink colours across the card. I used this same colour wash to create the look of the rainbow river splashing out of the banks for extra fun and of course texture. 
I completed my card, as ever, with plenty of sequins. For this card I used a combination of 4mm splarking clear and Pink Peonies sequins and 6mm lemon drop, aquamarine, pink blush and snow sequins all from Pretty Pink Posh.


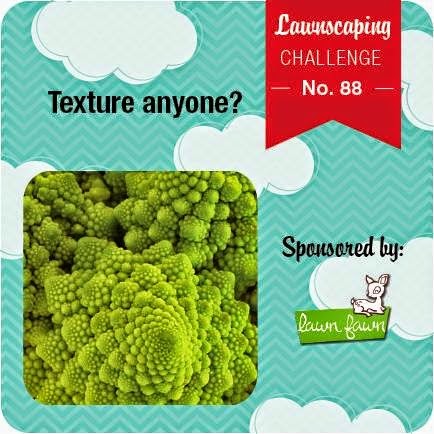
Below is the Lawnscaping Challenge inspiration photo. Click on it to go straight to the challenge blog to see the amazing design team inspiration all the other awesome entries:

Monday, 25 August 2014

You Make Me a Happy Camper Card


Hi guys,

It's been a busy crafty bank holiday weekend for me and this is the last of the cards I've been making. I made this card for the Avery Elle AEIHeartU Challenge No. 14  and Paper Crafting Challenge No. 17  sequin challenges. I don't make many cards with a lot of white space so this is something a bit different for me. I used paper piecing and a little stamping to make this card using the Avery Elle Happy Camper stamp set and one of my new favourite 6x6 paper pads from the Crate Paper Notes & Things collection - enjoy!


I used a grey polka-dot notecard from Pebbles for my card base. I then die cut a scalloped rectangle from Neenah Solar White Cardstock using one of the Mama Elephant Femme Frames dies. 

Next I used the lake stamp from teh Avery Elle Happy Camper stamp set and stamped it nto the reverse of the cardstock rectangle using Hero Arts Soft Vanilla Shadow Ink. I used a Fiskars craft knife to cut the outline of the image from the cardstock to use as the aperture for the shaker element of my card. I stamped the cloud images directly onto the white cardstock using Pool Party ink from Stampin' Up. I also stamped the tree images using Pear Pizzaz ink, also from Stampin' Up. 

Next I stamped the mountains, trees, canoe and fox images onto the reverse side of several patterened papers from the Notes & Things 6x6 paper pad from Crate paper. Again I used Hero Arts Soft Vanilla ink. I then fussy cut the images - believe me this was pretty fiddly and time-consuming! - and adhered the to the front of my card using small pieces of foam tape. 

I stamped the sentiment from the Happy Camper Stamp set onto the front of my card using Hero Arts Charcoal Midtone Ink - this gave a little softer effect than black ink.

I adhered acetate behind the lake aperture and carefully lined the edge with foam tape. I then placed sequins where I wanted my lake to be and glued the front of my card to the card base. I used 4mm Sparkling Clear sequins and 6mm Aquamarine sequins from Pretty Pink Posh, as well as a few others from my stash. Finaly I completed my card by adhereing a few more sequins to the front. 


Clicking on the badge below will take you to the challenge post and the rest of the great entries for the 14th Avery Elle challenge:


Hoppy Birthday Card


Hi guys

I made todays card for the Mama Elephant & Me August Challenge. The theme is watercolouring and birthdays and I coudn't resist using more pink and hearts with the cute sitting bunny image from the Honey Bunny stamp set from Mama Elephant. I love how pretty and feminine this card turned out and I'll be sending it to my Aunty for her birthday next month - hope you all like it xx


For the base of my card I used a white notecard from Papermania. I die cut the stitched rectangle from the Mama Elephant Femme Frames die set from Ranger watercolour paper. I used a Ranger ink blending tool and three shades of Distress Ink (Worn Lipstick, Tattered Rose and Antique Linen) to create my background. I then flicked clean water over the inked paper to create a pattern. To soften the look of the background I overlayed it with white vellum die cut with the scalloped rectangle die also from the Femme Frames die set. I then die cut lots of small hearts from the vellum, using the Simon Says Stamp tiny hearts dies, to allow some of the inked background to peek through.

Next I die cut the stitched circle from watercolour paper using the Lawn Fawn Stitched Party Banners die set. I adhered this to the vellum overlay with foam tape. I stamped the bunny image from the Mama Elephant Honey Bunny stamp set onto some more watercolour paper, using Versafine black ink. I coloured the image in a watercour style using Distress Inks and water. I used Antique Linen Distress Ink for the bunny's fur and added pink to his cheeks and the tips of his ears using Tattered Rose Ditress Ink. I then fussy cut the image and adhered it to the stitched circle with more foam tape. The Hoppy Birthday sentiment, from the Lawn Fawn Critters Down Under stamp set, was stamped onto a scrap of watercolour paper using Versafine ink. I then cut the paper into a banner shape and adhered this to my card with foam tape.

The heart shaped ballon was cut from watercolour paper, coloured with Worn Lipstick Distress Ink, using the heart die from the Lawn Fawn Stitched Party Banners die set. I adhered it to the card with foam tape and used a scrap of pink bakers twine to attach the baloon to the bunny's paw. I added shine to the balloon by covering it with a layer of glossy accents and added a 4mm Sparkling Clear sequin from Pretty Pink Posh for extra sparkle.

I completed my card by adding a variety of sequins. I used 4mm and 6mm Sparkling clear sequins, 6mm Watermelon sequins and 6mm Pink Blush sequins from Pretty Pink Posh. I also used several 8mm Salmon pink sequins from my stash. The sequins added fun sparkle as well as hiding the foam tape I used to adhere the vellum layer to the rest of the card.


Clicking on the link below will take you to the challenge post, featuring everyone's fab entries:


And clicking on the shopping bag below will take you to the Mama Elephant website where you can find lots of inspiration as well as the store to buy lots of crafty goodies:


Sunday, 24 August 2014

Happier Than a Pig in Poop Card


Hello everyone,

So this week I've taken the plunge and gone for a more professional look to my photographs. Rather than taking the photo on a shelf in my craft room (and having to rely on the pretty dismal British weather to provide enough light!) I bought daylight lamps and made a light defuser box. I'm really pleased with the improvement in image quality so far and I'm sure I will achieve even better results with a bit more practice. Anyway, I hope you like the card and that you're able to see what I've been up to that little bit clearer now.


My card base was cut from a peice of Neenah Desert Storm cardstock. Next I layered a peice of pink heart patterned paper from the Dear Lizzy Daydreamer collection 6x6 paper pad. I used a thin strip of coordinating paper from the same collection to die cut a scalloped edge which I adhered to the top of the first peice of patterned paper. I used a Paper Smooches scalloped edge die from the Borders 2 set. 

Next I trimmed a small piece of Ranger Watercolour paper and die cut the top edge with the notebook paper edge die, also from the Paper Smooches Borders 2 set. I wanted to create a messy watercolour background to make it look ike the pig had been splashing around. I did this using Vintage Photo Distress Ink and plenty of water. I dried the backgrond with my heat gun and adhered it ti the card using foam tape, to create dimension. 

I stamped the happy little pig image from the Green Acres stamp set by Paper Smooches, twice onto patterned paper using Hero Arts Mid-tone ink in Cup O' Joe. I then fussy cut the images and paper peiced them, using the second image to add dimension to his nose. I adhered the images to the background using foam tape.

Next I trimmed a strip pf wood grain patterened paper from my stash and die cut he top edge once again with a die from the Borders 2 set. I used the stamp edge die to create the look of fencing. I then die cut three small hearts from the patterened paper using the Simon Says Stamp Mini Hearts die. I adhered the patterened paper to the card with foam tape.

The word "happier" was die cut using my Cricut Explore and adhered to the card using silicone glue. The remainder of the sentiment was stamped using a "create your own" label stamp from staples. I really love the tiny font and how I can quickly and esily create any sentiment I like.

I completed the card using several pink sequins from the Neat & Tangled Spring Mix sequins. I also used a couple of 4mm Sparkling Clear sequins from Pretty Pink Posh.


Clicking on the image below will take you to the Paper Smooches Sparks August Anything Goes challenge:


And clicking on the image below will take you to the fabulous Paper Smooches website: