Showing posts with label simon says stamp. Show all posts

Saturday, 10 October 2015

Another Create a Smile card for the November Guest Designer Search

Hello again,

Well it turns out I had a little longer until the deadline than I thought so I decided to create a 'sister' card to my original entry - I love the Whimsical Wheels stamp set so much I just couldn't resist the opportunity to use it again. There's still a little time to enter yourself if you'd like. Just click on the image below and it will take you staright to the original blog post:


So I chose to make another little love note card - I know it's not valentines day but it's just what I felt like creating I guess. To be honest I'm probably just putting off starting the Xmas cards - there's nothing quite like needing to do something to make me immediately want to do something else!

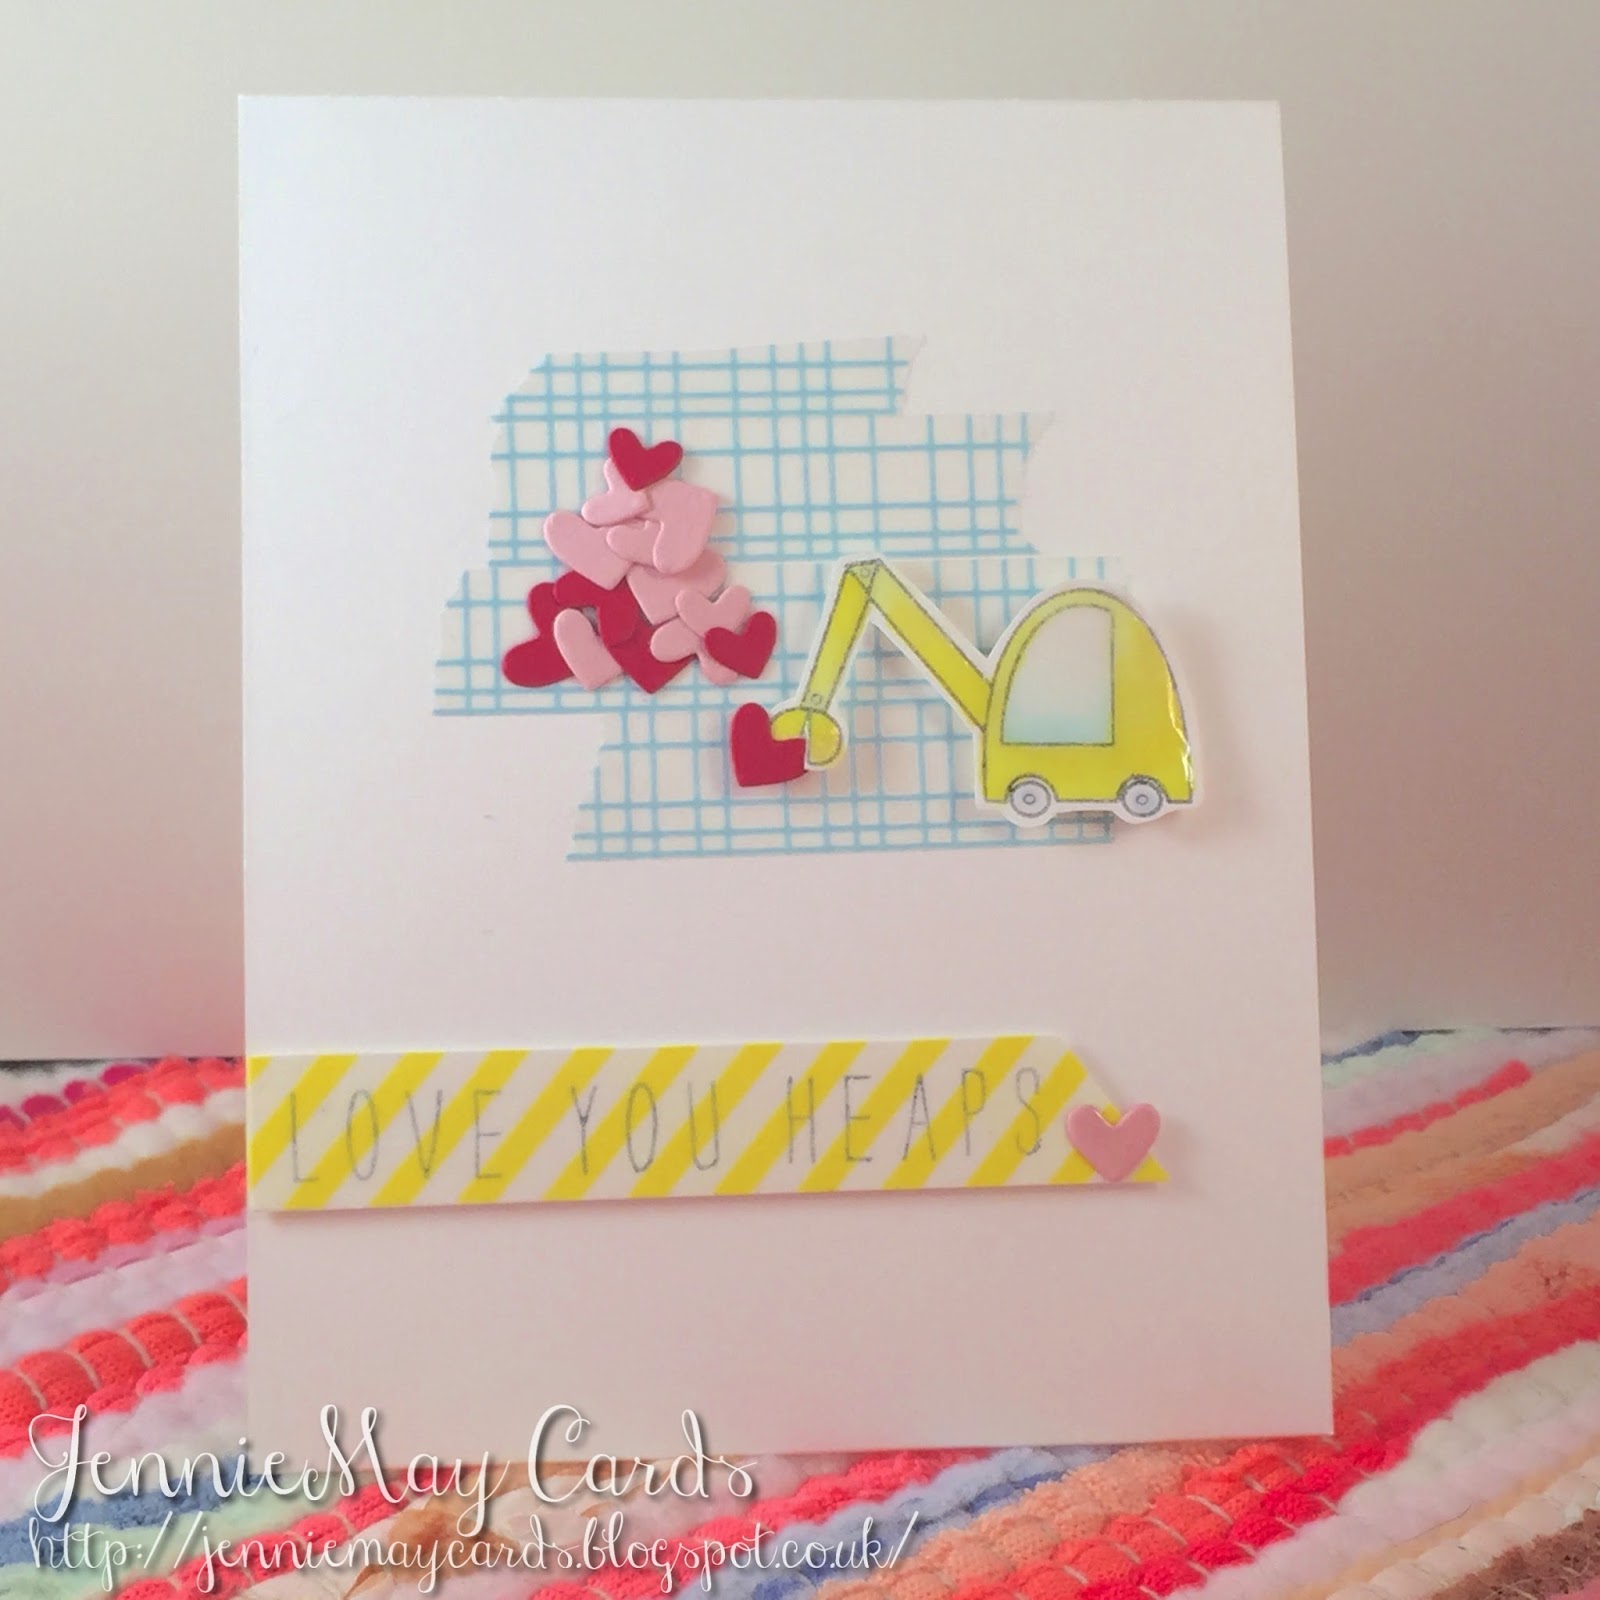
My card case is good old Neenah Solar White 110lb cut to A2 size. I rounded one of the corners for a more interesting shape. I decided to stick to pastel colours and a washi tape background as per my previous card. I used a really cute grid washi with little hearts and the word 'love' written in pencil. I'm not sure where I got if from but I love it.


Next I stamped the train and carriage images from the Wimsical Wheels stamps set from Create a Smile with Momento Tuxedo Black Ink. Again I used second generation stamping for a more subtle outline which helped to capture some of the fine lines and details in the stamp. I also thought it looked a little like pencil lead to give an almost hand drawn feel. I coloured the image with Copic Markers, fussy cut it and adhered it to my card with foam pads.


Next I created a pink ombre look on a scrap of card and stamped my sentiment onto it with more second generation stamping in Tuxedo Black ink and also Avery Elle Pigment Ink in the shade Mint To Be. This sentiment has to be one of the best ever. No only does it fit with the cute train image, it also reminds me of an episode of the simpsons when Lisa gives Ralf a card with this sentiment on - Love it!

I added hearts to the carriages, die cut from card scraps using my Simon Says Stamp mini hearts dies. I also cut heart shaped puffs of steam from cotton wool pads and adhered the whole lot to my card with Claudia Hellmuth Multi-medium matte liquid adhesive. I completed my card by adding glossy accents to the tarin and heart next to my sentiment.


Anyway, hope you like my card - all comments gratefully received xx

Create a Smile November Guest Designer Search

Hi guys,

So Create a smile are looking for a guest designer for next month and I thought I'd apply. Click on the image below to check out their blog post and why not give it a go yourself:


So here's my card. I used my current favourate create a smile stamp set, Whimsical Wheels, to create my design. Let me know what you think in the comments and, if you're interested, read on for how I created it:

I used Neenah Solar White 110lb cardstock for my card base, cut to A2 size. I then used some grid patterned washi tape for the background of my little scene. I used the digger image from the Whimsical wheels stamp set and stamped it using Momento Tuxedo Black ink. I second generation stamping to create a muted grey lined image which I think works well for this mainly pastel coloured card. I then coloured my image using copic markers. I used a coat of glossy accents to give it some shine and adhered it to the card using foam pads.


I die cut heart shapes from pink and red cardstock scraps using my Simon Says Stamp mini heart dies and adhered them in a 'heap' using tombo mono liquid adhesive. I used Bella Letters from Mama Elephant to create my sentiment. Again I used Tuxedo Black ink and second generation stamping and I used more washi tape to give a pop of colour. I put the sentiment on a strip of card and adhered it with more foam pads.


Friday, 13 February 2015

I Dig You Card


Hi again,

So this is my second card I'm entering into the Create a Smile March Guest DT spot search. My card uses the Whimsical Wheels stamp set from Create a Smile and I created it for my god son. He loves diggers and so when I saw this stamp set I had to get it so I could make him a valentines card with it. It would be great it you could join in two and clicking on the image below will take you straight to the blog post:


http://createasmilestamps.blogspot.co.uk/2015/01/march-guest-designer-call.html

To make the card I started with a 110lb Neenah Solarwhite base. I adhered a peice of cityscene patterened paper from the First Edition Man Made collection to the front of my card. Next I stamped the digger image and sentiment onto more solarwhite cardstock with Memento Tuxedo Black Ink. I then coloured the digger image with copic markers, fussy cut it and adhered it to the card with foam tape. I also cut out the sentiment, die cut a small heart from it and then adhered it to the card with more foam tape. Next I die cut a peice of solarwhite cardstock with one of the Mama Elephant Landscape Trio dies. I then die cut another small heart from the cardstck to leave some of the patterened paper peeking through. I completed the card by adding a Doodlebug enamel heart to the diggers bucket.


This is a close-up of the digger so you can see the Doodlebug enamel heart more clearly:


Saturday, 15 November 2014

Sending Warm Wishes Card


Hello everyone,

I decided to try another CAS design this week, which I'm entering into the Casology Festive Challenge and the CAS on Sunday Ribbon and Twine Challenge. I used a simple colour scheme, washi tape and a subtley textured white background to create my design. Please let me know what you think in the comments box below.


Firstly I die cut a rectangle of Simon Says Stamp Woodgrain Cardstock with one of the Lawn Fawn Stitched Rectangle Dies. I mounted this onto a white A2 cardbase. I created the background for my design using red woodgrain washi from Freckled Fawn, as well as three others from m stamp. Next I stamped the mitten images from the Wplus9 Winter Wishes stamp set onto Neenah Solar White Cardstock using Papaya pigment ink from Avery Elle. I fussy cut the mittens and adhered them to the card with foam squares for dimension. I added Peppermint twine from Lawn Fawn and a sentiment, also from the Winter Wishes set. I completed my design with several enamel dots from Freckled Fawn.


Clicking on the images below will take you to Casology and CAS on Sunday challenge posts:


Monday, 10 November 2014

You're My Dreamboat Card


Hi Guys,

Long time no see! I decided to try a new challenge this week and I opted for the Casology Sea Challenge. I live by the sea and some of my favourite creations have had a nautical theme. I had hoped to try making some more Christmas cards but, as usual, I'm avoiding what needs to be done, and I've gone for a valentines/anniversary card instead. Oh well...I'll get to the Christmas cards eventually - enjoy!
 

 I used paper from the 6x6 Let's Polka paper pad from Lawn Fawn. I die cut the wave-shaped edge using a Mama Elephant die and used one of the Landscape Trio dies, also from ME, to create the insert. Next I made an origami sail boat from a peice of music manuscript. I added inlaid die cut hearts using a Simon Says Stamp die and dreamy cloads cut from vellum using a Paper Smooches die. The sentiment was stamped using a mini alphabet stamp from a local stationary store. I adhered my design to a crisp white cardstock base made with Neenah 110lb cardstock, to frame it.


 Here's close-up of my origami sail boat and inlaid hearts:
 

 Clicking on the image below will take you to the challenge post on the Casology blog:

http://casology.blogspot.co.uk/2014/11/week-120-sea.html

Monday, 25 August 2014

Hoppy Birthday Card


Hi guys

I made todays card for the Mama Elephant & Me August Challenge. The theme is watercolouring and birthdays and I coudn't resist using more pink and hearts with the cute sitting bunny image from the Honey Bunny stamp set from Mama Elephant. I love how pretty and feminine this card turned out and I'll be sending it to my Aunty for her birthday next month - hope you all like it xx


For the base of my card I used a white notecard from Papermania. I die cut the stitched rectangle from the Mama Elephant Femme Frames die set from Ranger watercolour paper. I used a Ranger ink blending tool and three shades of Distress Ink (Worn Lipstick, Tattered Rose and Antique Linen) to create my background. I then flicked clean water over the inked paper to create a pattern. To soften the look of the background I overlayed it with white vellum die cut with the scalloped rectangle die also from the Femme Frames die set. I then die cut lots of small hearts from the vellum, using the Simon Says Stamp tiny hearts dies, to allow some of the inked background to peek through.

Next I die cut the stitched circle from watercolour paper using the Lawn Fawn Stitched Party Banners die set. I adhered this to the vellum overlay with foam tape. I stamped the bunny image from the Mama Elephant Honey Bunny stamp set onto some more watercolour paper, using Versafine black ink. I coloured the image in a watercour style using Distress Inks and water. I used Antique Linen Distress Ink for the bunny's fur and added pink to his cheeks and the tips of his ears using Tattered Rose Ditress Ink. I then fussy cut the image and adhered it to the stitched circle with more foam tape. The Hoppy Birthday sentiment, from the Lawn Fawn Critters Down Under stamp set, was stamped onto a scrap of watercolour paper using Versafine ink. I then cut the paper into a banner shape and adhered this to my card with foam tape.

The heart shaped ballon was cut from watercolour paper, coloured with Worn Lipstick Distress Ink, using the heart die from the Lawn Fawn Stitched Party Banners die set. I adhered it to the card with foam tape and used a scrap of pink bakers twine to attach the baloon to the bunny's paw. I added shine to the balloon by covering it with a layer of glossy accents and added a 4mm Sparkling Clear sequin from Pretty Pink Posh for extra sparkle.

I completed my card by adding a variety of sequins. I used 4mm and 6mm Sparkling clear sequins, 6mm Watermelon sequins and 6mm Pink Blush sequins from Pretty Pink Posh. I also used several 8mm Salmon pink sequins from my stash. The sequins added fun sparkle as well as hiding the foam tape I used to adhere the vellum layer to the rest of the card.


Clicking on the link below will take you to the challenge post, featuring everyone's fab entries:


And clicking on the shopping bag below will take you to the Mama Elephant website where you can find lots of inspiration as well as the store to buy lots of crafty goodies:


Sunday, 24 August 2014

Happier Than a Pig in Poop Card


Hello everyone,

So this week I've taken the plunge and gone for a more professional look to my photographs. Rather than taking the photo on a shelf in my craft room (and having to rely on the pretty dismal British weather to provide enough light!) I bought daylight lamps and made a light defuser box. I'm really pleased with the improvement in image quality so far and I'm sure I will achieve even better results with a bit more practice. Anyway, I hope you like the card and that you're able to see what I've been up to that little bit clearer now.


My card base was cut from a peice of Neenah Desert Storm cardstock. Next I layered a peice of pink heart patterned paper from the Dear Lizzy Daydreamer collection 6x6 paper pad. I used a thin strip of coordinating paper from the same collection to die cut a scalloped edge which I adhered to the top of the first peice of patterned paper. I used a Paper Smooches scalloped edge die from the Borders 2 set. 

Next I trimmed a small piece of Ranger Watercolour paper and die cut the top edge with the notebook paper edge die, also from the Paper Smooches Borders 2 set. I wanted to create a messy watercolour background to make it look ike the pig had been splashing around. I did this using Vintage Photo Distress Ink and plenty of water. I dried the backgrond with my heat gun and adhered it ti the card using foam tape, to create dimension. 

I stamped the happy little pig image from the Green Acres stamp set by Paper Smooches, twice onto patterned paper using Hero Arts Mid-tone ink in Cup O' Joe. I then fussy cut the images and paper peiced them, using the second image to add dimension to his nose. I adhered the images to the background using foam tape.

Next I trimmed a strip pf wood grain patterened paper from my stash and die cut he top edge once again with a die from the Borders 2 set. I used the stamp edge die to create the look of fencing. I then die cut three small hearts from the patterened paper using the Simon Says Stamp Mini Hearts die. I adhered the patterened paper to the card with foam tape.

The word "happier" was die cut using my Cricut Explore and adhered to the card using silicone glue. The remainder of the sentiment was stamped using a "create your own" label stamp from staples. I really love the tiny font and how I can quickly and esily create any sentiment I like.

I completed the card using several pink sequins from the Neat & Tangled Spring Mix sequins. I also used a couple of 4mm Sparkling Clear sequins from Pretty Pink Posh.


Clicking on the image below will take you to the Paper Smooches Sparks August Anything Goes challenge:


And clicking on the image below will take you to the fabulous Paper Smooches website:


Sunday, 11 May 2014

Welcome Baby Card

This is the second of two cards I made for two friends who we threw a joint surprise baby shower for. For this card, we didn't know the sex of the baby so I tried to go with something gender neutral - although in the end I couldn't resist using this pretty flowers so it essentially ended up quite feminine. I uses Fresh Cut Florals stamps and dies from Wplu9 - I absolutely adore these stamps and from the moment I saw them used on Jennifer McGuire's YouTube channel I knew I had to have them. It was searching for them on-line that led me to Make The Day Special, an awesome online store that sells US stamps, dies, inks and paper pads in the UK. I used various inks from Stampin' Up and Hero Arts including Green Hills, Pistachio Pudding, Gumball Green, Passion Flower, Soft Lilac, Blushing Bride, Rich Razzleberry, Crisp Cantaloupe, Coastal Cabana, Bermuda Bay, Calypso Coral, Crushed curry and Daffodil Delight. The adorable duck is from a Stampin' Up set called Storybook Friends. I stamped him with smoky slate ink to complete the soft look I was going for and coloured the beak and feet with a Crushed Curry Stampin' Up marker. The sentiment is from Handwritten Borders by Simon Says Stamp and was stamped in Crisp Cantaloupe ink onto a strip of matching cardstock.