Showing posts with label tim holtz distress ink. Show all posts

Sunday, 18 October 2015

Hello Autumn Card

Hi Everyone,

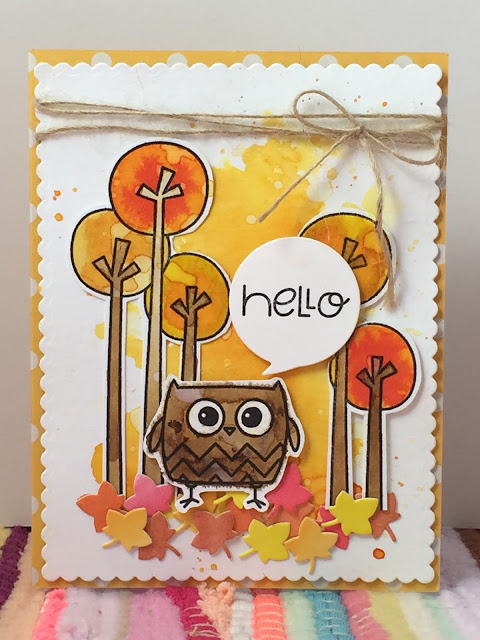
Unfortunately I've not been well this week but, since I'm feeling a bit better, I decided to cheer myself up by entering the Paper Smooches Sparks October Picture Perfect Challenge. The picture had lots of autumn colours and leaves for inspiration and this is what I created. Hope you like it!:


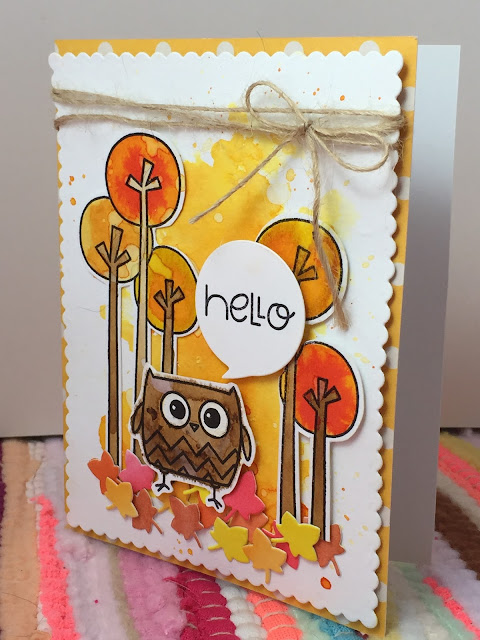
I started off with a yellow polka-dot note card from Pebbles as my card base. Next I die cut a piece of Ranger watercolour cardstock with the scalloped rectangle die from Mama Elephants Femme Frames dies. I used Distress inks in Spiced Marmalade and Mustard Seed to create a watercolour background for my woodland scene.


Next I stamped the tree images from the Spring Groves stamp set and the owl image from the Spookalicious stamp set, both from Paper Smooches, onto more watercolour cardstock. I used Ranger Black Tie die ink - I'm so impressed with this ink. It gives a crisp black image and is completed waterproof (I found my Memento Tuxedo black ink bleeds with water). I also stamped the hello sentiment from Paper Smooches Gently Seasoned stamp set with the same ink and die cut it with a Paper Smooches Wordbubble Die. Next I used more disress inks in Vintage Photo, Festive Berries, Spiced Marmalade and Mustard Seed to colour the trees and owl. I was initially a little disapointed with the colour bleeding outside the lines of the owl but then I decided it makes him look extra cute and fluffy. 


Next I watercoloured more cardstock in various colours and die cut leaves with one of the Papersmooches Seasonal Trees Dies. I adhered everything to my card with glue dots and foam squares for dimension and finished with hemp twine and a bow.

If you want to buy any of the Paper Smooches stamps and dies I used for this project, or anything else from this awesome company, then clicking on the image below will take you to their store. Happy Crafting!

Friday, 29 August 2014

I Thank My Lucky Stars For You Sweet Girl Card


Hi everyone,

So I've been trying to use more white space in my cards recently and today was the day for me to make my first CAS card. I made it for the CAS on Sunday challenge no. 40 Rock a Bye Baby. I really enjoyed making this soft, pretty card using watercolour techniques and a few great stamps from Mama Elephant, Wplus9 and Lawn Fawn. Hope you like it xx


First I cut and scored a piece of Ranger Watercolour Paper to A2 size for my card base. I then used Worn Lipstick and Milled Lavender Distress Inks and plenty of water to create the watercolour background. Once I had dried this with my heat tool I stamped several star images from the Wplus9 Lucky Stars stamp set in more of the Milled Lavender Distress Ink. I splattered some watered down Worn Lipstick ink over the top and dried it again with my heat tool. I stamped one of the sentiments, also from the Lucky Stars set, in Hero Arts Charcoal mid-tone ink. I also added the "sweet girl" sentiment from the Hello Baby stamp set from Lawn Fawn. The tiny heart was also taken from this set and is stamped in Worn Lipstick ink.


Next I stamped one of the cute penguin images from the Mama Elephant Love Quotes stamp set onto some more watercolour paper using the same Charcoal Ink I used for the sentiment. I coloured the image with distress ink and water, added freckles to its cheeks using a white Uniball gel pen and a littel sparkle with my Zig Wink of Stella glitter pen. I adhered my penguin to the card with silicone glue to add dimension.

I added some more Worn Lipstick ink to some scraps of watercolour paper and die cut them using the Simon Says Stamp Mini Hearts dies. I used my Wink of Stella pen and glossy accents before adhereing the embellishments with silicone glue. I used two silver 4mm sequins to complete this simple card.


Clicking on the link below will take you to the challenge blog post I am entering this card in, so you can check out all the other amazing entries:

Wednesday, 27 August 2014

Make a Wish Card

Hello again, 

Well that's four cards in four days this week - I'd like to think that I've just been struck with a huge amount of energy and creativity but sadly I think I'm just tryong to avoid revising for my exam next month. Oh well, I'm enjoying myself anyway! This card was made for the Lawnscaping Challenge No. 88 - Texture. For the inspiration for this card I went back to my childhood days of playing with My Little Pony (all you 80s kids will know what I mean!) and used pretty pastels and images from the Critters Ever After stamp set from Lawn Fawn. I used textured watercolour card stock, smooth acetate and fluffy silk parchment to add a variety of textures to my design - Enjoy!


My card base was a white notecard from Papermania. I next used the Femme Frames die set from Mama Elephant to cut the front of a powder blue Hero Arts notecard and a piece of Ranger watercolour cardstock into layers. I then created a aperture in the front layer to allow a watercolour rainbow river to peek through. To create this a used Worn Lipstick, Mustard Seed and Peacock Feathers distress inks and plenty of water to create a watercolour wash on another piece of watercolour card stock. I love how the ink did the work for me and created all the colours inbetween with no effort at all from me. I dried this with my heat tool and then splashed clean water over the top. The distress ink reacted with the water a second time to create a watermarked texture. Once this had dried again I wasn't happy with how bright the colours were so I overlayed this with a piece of acetate to create a more pastel look which was much more in-keeping with my design. I adhered this behind the aperture window. The front of the aperture was created with acetate for a contrasing texture the rough watercolour cardstock.
Next I cut a number of cloudy shapes from silk parchment. I've had this in my stash so long I can't even remember where I got it from but I was so pleased to finally be able to use it. To make the clouds look extra fluffy I distressed the edges slightly with my Stampin' Up distress tool. I adhered them to the card with silicone glue to create lots of dimension.
The unicorn image is from the Critters Ever After stamp set from Lawn Fawn. I stamped it onto watercolour cardstock using Hero Arts Charcoal mid-tone ink, for a softer look than my usual black ink. I used Spectrum Noir pencils, paper stubs and blending solution to create smooth shading. I then used a Uniball white gel pen to add freckles. I used the Zig Wink of Stellar clear glitter pen to add sparkle to the mane and tail and Ranger Glossy Accents to add shine to the horn and hooves. Again I adhered this to the card with Silicone glue.
I stamped the Make a Wish sentiment, also from the Critters Ever After Stam set with the charcoal ink. I added lots of tiny star stamps using the three colours of distress ink and flicked clean water over the card to allow them to blend a little. I also masked off the centre of my card and flicked watered down versions of the three ink colours across the card. I used this same colour wash to create the look of the rainbow river splashing out of the banks for extra fun and of course texture. 
I completed my card, as ever, with plenty of sequins. For this card I used a combination of 4mm splarking clear and Pink Peonies sequins and 6mm lemon drop, aquamarine, pink blush and snow sequins all from Pretty Pink Posh.


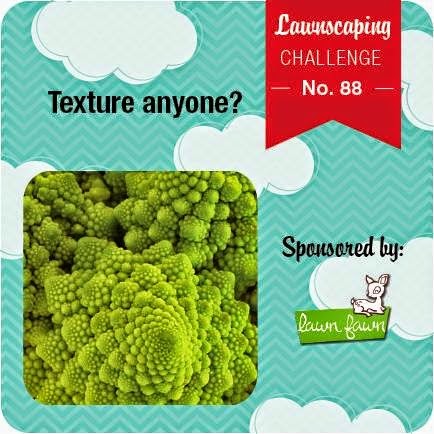
Below is the Lawnscaping Challenge inspiration photo. Click on it to go straight to the challenge blog to see the amazing design team inspiration all the other awesome entries: