Sunday, 31 August 2014

Get Better In Warp Speed Card


Hi guys,

When I'm making cards I generally like to have a tv programme on in the background. Most recently I've been re-watching old epidsodes of Star Trek Voyager - yes, I know I'm a geek! Today I've been inspired by everything I've seen on screen and created a card for the Paper Smooches Sparks August Designer Drafts Challenge, using the Space Cadet stamp set from Paper Smooches. Happy crafting xx


To Create my card I started with a puple notecard from Hero Arts. Next I layered a piece of Ranger Watercolour Paper over the front. I created the galaxy background using Windsor Newton India Ink and Distress inks in Dusty Concord and Salty Ocean shades. I first wet the paper and then dotted on the ink. I used a paintbrush to blend and used a mini mister filled with water to create the cloud-like feathered effect to the edges. Once I had dried this with my heat tool I splattered some white Windsor and Newton ink over the top to create the impression of stars.

Next I stamped several images from the Paper Smooches Space Cadet stamp set onto Neenah Solar White cardstock using my new Black Licorice hybrid ink from My Favourite Things. I coloured rge umages with Spectrum Noir pencils and blended with paper stubs and blending solution. I added dot detail with my Uniball white gel pen and added shine to the space ship with Ranger Glossy Accents . I fussy cut the images and adhered them to the front of the card using foam tape to create dimension. The sentiment, also from the Space Cadet stamp set was stamped using Versamark ink and heat embossed with Ranger Liquid Platinum embossing powder.

I kept embellishments fairly minimal on this card. I used my Simon Says Stamp Mini Heart die set to cut hearts from cardstock coloured with more Dusty Concord Distress Ink. I then adered several Sparkling Clear sequins from Pretty Pik Posh in 6mm and 4mm sizes.


Please click on the challenge banner below to check out everyone's fab entries for this challenge:


Or, if you click on the blinkie below you'll go straight to the Paper Smooches store where you can buy all their lovely stamps and dies to play along with the next challenge:

Friday, 29 August 2014

I Thank My Lucky Stars For You Sweet Girl Card


Hi everyone,

So I've been trying to use more white space in my cards recently and today was the day for me to make my first CAS card. I made it for the CAS on Sunday challenge no. 40 Rock a Bye Baby. I really enjoyed making this soft, pretty card using watercolour techniques and a few great stamps from Mama Elephant, Wplus9 and Lawn Fawn. Hope you like it xx


First I cut and scored a piece of Ranger Watercolour Paper to A2 size for my card base. I then used Worn Lipstick and Milled Lavender Distress Inks and plenty of water to create the watercolour background. Once I had dried this with my heat tool I stamped several star images from the Wplus9 Lucky Stars stamp set in more of the Milled Lavender Distress Ink. I splattered some watered down Worn Lipstick ink over the top and dried it again with my heat tool. I stamped one of the sentiments, also from the Lucky Stars set, in Hero Arts Charcoal mid-tone ink. I also added the "sweet girl" sentiment from the Hello Baby stamp set from Lawn Fawn. The tiny heart was also taken from this set and is stamped in Worn Lipstick ink.


Next I stamped one of the cute penguin images from the Mama Elephant Love Quotes stamp set onto some more watercolour paper using the same Charcoal Ink I used for the sentiment. I coloured the image with distress ink and water, added freckles to its cheeks using a white Uniball gel pen and a littel sparkle with my Zig Wink of Stella glitter pen. I adhered my penguin to the card with silicone glue to add dimension.

I added some more Worn Lipstick ink to some scraps of watercolour paper and die cut them using the Simon Says Stamp Mini Hearts dies. I used my Wink of Stella pen and glossy accents before adhereing the embellishments with silicone glue. I used two silver 4mm sequins to complete this simple card.


Clicking on the link below will take you to the challenge blog post I am entering this card in, so you can check out all the other amazing entries:

Wednesday, 27 August 2014

Make a Wish Card

Hello again, 

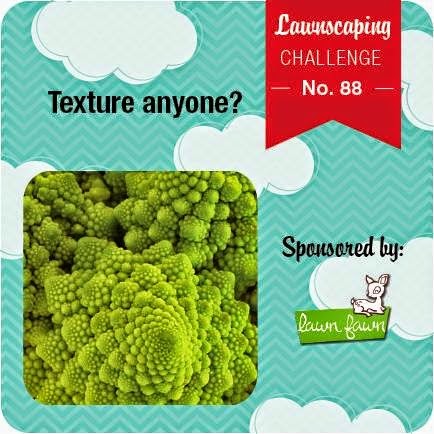
Well that's four cards in four days this week - I'd like to think that I've just been struck with a huge amount of energy and creativity but sadly I think I'm just tryong to avoid revising for my exam next month. Oh well, I'm enjoying myself anyway! This card was made for the Lawnscaping Challenge No. 88 - Texture. For the inspiration for this card I went back to my childhood days of playing with My Little Pony (all you 80s kids will know what I mean!) and used pretty pastels and images from the Critters Ever After stamp set from Lawn Fawn. I used textured watercolour card stock, smooth acetate and fluffy silk parchment to add a variety of textures to my design - Enjoy!


My card base was a white notecard from Papermania. I next used the Femme Frames die set from Mama Elephant to cut the front of a powder blue Hero Arts notecard and a piece of Ranger watercolour cardstock into layers. I then created a aperture in the front layer to allow a watercolour rainbow river to peek through. To create this a used Worn Lipstick, Mustard Seed and Peacock Feathers distress inks and plenty of water to create a watercolour wash on another piece of watercolour card stock. I love how the ink did the work for me and created all the colours inbetween with no effort at all from me. I dried this with my heat tool and then splashed clean water over the top. The distress ink reacted with the water a second time to create a watermarked texture. Once this had dried again I wasn't happy with how bright the colours were so I overlayed this with a piece of acetate to create a more pastel look which was much more in-keeping with my design. I adhered this behind the aperture window. The front of the aperture was created with acetate for a contrasing texture the rough watercolour cardstock.
Next I cut a number of cloudy shapes from silk parchment. I've had this in my stash so long I can't even remember where I got it from but I was so pleased to finally be able to use it. To make the clouds look extra fluffy I distressed the edges slightly with my Stampin' Up distress tool. I adhered them to the card with silicone glue to create lots of dimension.
The unicorn image is from the Critters Ever After stamp set from Lawn Fawn. I stamped it onto watercolour cardstock using Hero Arts Charcoal mid-tone ink, for a softer look than my usual black ink. I used Spectrum Noir pencils, paper stubs and blending solution to create smooth shading. I then used a Uniball white gel pen to add freckles. I used the Zig Wink of Stellar clear glitter pen to add sparkle to the mane and tail and Ranger Glossy Accents to add shine to the horn and hooves. Again I adhered this to the card with Silicone glue.
I stamped the Make a Wish sentiment, also from the Critters Ever After Stam set with the charcoal ink. I added lots of tiny star stamps using the three colours of distress ink and flicked clean water over the card to allow them to blend a little. I also masked off the centre of my card and flicked watered down versions of the three ink colours across the card. I used this same colour wash to create the look of the rainbow river splashing out of the banks for extra fun and of course texture. 
I completed my card, as ever, with plenty of sequins. For this card I used a combination of 4mm splarking clear and Pink Peonies sequins and 6mm lemon drop, aquamarine, pink blush and snow sequins all from Pretty Pink Posh.


Below is the Lawnscaping Challenge inspiration photo. Click on it to go straight to the challenge blog to see the amazing design team inspiration all the other awesome entries:


Monday, 25 August 2014

You Make Me a Happy Camper Card


Hi guys,

It's been a busy crafty bank holiday weekend for me and this is the last of the cards I've been making. I made this card for the Avery Elle AEIHeartU Challenge No. 14  and Paper Crafting Challenge No. 17  sequin challenges. I don't make many cards with a lot of white space so this is something a bit different for me. I used paper piecing and a little stamping to make this card using the Avery Elle Happy Camper stamp set and one of my new favourite 6x6 paper pads from the Crate Paper Notes & Things collection - enjoy!


I used a grey polka-dot notecard from Pebbles for my card base. I then die cut a scalloped rectangle from Neenah Solar White Cardstock using one of the Mama Elephant Femme Frames dies. 

Next I used the lake stamp from teh Avery Elle Happy Camper stamp set and stamped it nto the reverse of the cardstock rectangle using Hero Arts Soft Vanilla Shadow Ink. I used a Fiskars craft knife to cut the outline of the image from the cardstock to use as the aperture for the shaker element of my card. I stamped the cloud images directly onto the white cardstock using Pool Party ink from Stampin' Up. I also stamped the tree images using Pear Pizzaz ink, also from Stampin' Up. 

Next I stamped the mountains, trees, canoe and fox images onto the reverse side of several patterened papers from the Notes & Things 6x6 paper pad from Crate paper. Again I used Hero Arts Soft Vanilla ink. I then fussy cut the images - believe me this was pretty fiddly and time-consuming! - and adhered the to the front of my card using small pieces of foam tape. 

I stamped the sentiment from the Happy Camper Stamp set onto the front of my card using Hero Arts Charcoal Midtone Ink - this gave a little softer effect than black ink.

I adhered acetate behind the lake aperture and carefully lined the edge with foam tape. I then placed sequins where I wanted my lake to be and glued the front of my card to the card base. I used 4mm Sparkling Clear sequins and 6mm Aquamarine sequins from Pretty Pink Posh, as well as a few others from my stash. Finaly I completed my card by adhereing a few more sequins to the front. 


Clicking on the badge below will take you to the challenge post and the rest of the great entries for the 14th Avery Elle challenge:


Hoppy Birthday Card


Hi guys

I made todays card for the Mama Elephant & Me August Challenge. The theme is watercolouring and birthdays and I coudn't resist using more pink and hearts with the cute sitting bunny image from the Honey Bunny stamp set from Mama Elephant. I love how pretty and feminine this card turned out and I'll be sending it to my Aunty for her birthday next month - hope you all like it xx


For the base of my card I used a white notecard from Papermania. I die cut the stitched rectangle from the Mama Elephant Femme Frames die set from Ranger watercolour paper. I used a Ranger ink blending tool and three shades of Distress Ink (Worn Lipstick, Tattered Rose and Antique Linen) to create my background. I then flicked clean water over the inked paper to create a pattern. To soften the look of the background I overlayed it with white vellum die cut with the scalloped rectangle die also from the Femme Frames die set. I then die cut lots of small hearts from the vellum, using the Simon Says Stamp tiny hearts dies, to allow some of the inked background to peek through.

Next I die cut the stitched circle from watercolour paper using the Lawn Fawn Stitched Party Banners die set. I adhered this to the vellum overlay with foam tape. I stamped the bunny image from the Mama Elephant Honey Bunny stamp set onto some more watercolour paper, using Versafine black ink. I coloured the image in a watercour style using Distress Inks and water. I used Antique Linen Distress Ink for the bunny's fur and added pink to his cheeks and the tips of his ears using Tattered Rose Ditress Ink. I then fussy cut the image and adhered it to the stitched circle with more foam tape. The Hoppy Birthday sentiment, from the Lawn Fawn Critters Down Under stamp set, was stamped onto a scrap of watercolour paper using Versafine ink. I then cut the paper into a banner shape and adhered this to my card with foam tape.

The heart shaped ballon was cut from watercolour paper, coloured with Worn Lipstick Distress Ink, using the heart die from the Lawn Fawn Stitched Party Banners die set. I adhered it to the card with foam tape and used a scrap of pink bakers twine to attach the baloon to the bunny's paw. I added shine to the balloon by covering it with a layer of glossy accents and added a 4mm Sparkling Clear sequin from Pretty Pink Posh for extra sparkle.

I completed my card by adding a variety of sequins. I used 4mm and 6mm Sparkling clear sequins, 6mm Watermelon sequins and 6mm Pink Blush sequins from Pretty Pink Posh. I also used several 8mm Salmon pink sequins from my stash. The sequins added fun sparkle as well as hiding the foam tape I used to adhere the vellum layer to the rest of the card.


Clicking on the link below will take you to the challenge post, featuring everyone's fab entries:


And clicking on the shopping bag below will take you to the Mama Elephant website where you can find lots of inspiration as well as the store to buy lots of crafty goodies:


Sunday, 24 August 2014

Happier Than a Pig in Poop Card


Hello everyone,

So this week I've taken the plunge and gone for a more professional look to my photographs. Rather than taking the photo on a shelf in my craft room (and having to rely on the pretty dismal British weather to provide enough light!) I bought daylight lamps and made a light defuser box. I'm really pleased with the improvement in image quality so far and I'm sure I will achieve even better results with a bit more practice. Anyway, I hope you like the card and that you're able to see what I've been up to that little bit clearer now.


My card base was cut from a peice of Neenah Desert Storm cardstock. Next I layered a peice of pink heart patterned paper from the Dear Lizzy Daydreamer collection 6x6 paper pad. I used a thin strip of coordinating paper from the same collection to die cut a scalloped edge which I adhered to the top of the first peice of patterned paper. I used a Paper Smooches scalloped edge die from the Borders 2 set. 

Next I trimmed a small piece of Ranger Watercolour paper and die cut the top edge with the notebook paper edge die, also from the Paper Smooches Borders 2 set. I wanted to create a messy watercolour background to make it look ike the pig had been splashing around. I did this using Vintage Photo Distress Ink and plenty of water. I dried the backgrond with my heat gun and adhered it ti the card using foam tape, to create dimension. 

I stamped the happy little pig image from the Green Acres stamp set by Paper Smooches, twice onto patterned paper using Hero Arts Mid-tone ink in Cup O' Joe. I then fussy cut the images and paper peiced them, using the second image to add dimension to his nose. I adhered the images to the background using foam tape.

Next I trimmed a strip pf wood grain patterened paper from my stash and die cut he top edge once again with a die from the Borders 2 set. I used the stamp edge die to create the look of fencing. I then die cut three small hearts from the patterened paper using the Simon Says Stamp Mini Hearts die. I adhered the patterened paper to the card with foam tape.

The word "happier" was die cut using my Cricut Explore and adhered to the card using silicone glue. The remainder of the sentiment was stamped using a "create your own" label stamp from staples. I really love the tiny font and how I can quickly and esily create any sentiment I like.

I completed the card using several pink sequins from the Neat & Tangled Spring Mix sequins. I also used a couple of 4mm Sparkling Clear sequins from Pretty Pink Posh.


Clicking on the image below will take you to the Paper Smooches Sparks August Anything Goes challenge:


And clicking on the image below will take you to the fabulous Paper Smooches website:


Saturday, 16 August 2014

Cheer Up Grumpasaurus Card

Hey Guys,

I made this card for my Vicar who has been a bit sad recently. I really love the sentiment from the Paper Smooches Cuteasaurus stamp set and I thought it would be perfect for this card. I wanted to enter the card into this weeks Paper Smooches Sparks Challenge and the design is inspired by their photo.


The card base is a Pebbles notecard from their Garden Party Collection. I then die cut a piece of vellum using the scalloped edge frame from the Mama Elephant Femme Frames set. Next I used the inner frame from the same set to create a stitched rectangle of Neenah Solar White cradstock. I stamped the Hero Arts Galaxy wood block stamp with Stampin' Up Smokey Slate ink onto this. I then used a piece of woodgrain paper from the Dear Lizzy Daydreamer 6x6 paper pad and die cut it into to a speech bubble using the Mama Elephant Speech Trio dies. I die cut some tiny heart shaped windows into it using  Simon Says Stamp Mini Heart Set Craft dies and stamped the sentiment from the Paper Smooches Cuteasaurus stamp set in Hero Arts Charcoal ink. The dinosaur images are from the same Paper Smooches set as the sentiment and i stamped and paperpieced them using more 6x6 paper from the Dear Lizzy Daydreamer collection. The flowers that the dino on the right is holding are tiny images from the the Mama Elephant Honey Bunny stamp set which I painstakingly stamped and cut from scraps of pink patterned paper - good job I enjoy fussy cutting! I adered each of the layers with foam tape to create dimension and completed the card with twine from my stash and 4mm and 6mm Sparkling Clear sequins from Pretty Pink Posh.


I tried to take as much inspiration from the Paper Smooches photo as possible. The colour scheme of pale pink, pale aqua, white and grey is taken from it. I also used pink flowers and woodgrain inspiried by the wooden paintbrushes. The sparkling clear sequins were inspired by the glass jars and bottles.


Below is the photo that inspired my card. Click on it to go straight to the challenge post on the Paper Smooches Sparks website:

 August challenge

Clicking on the Paper Smooches badge below will take you straight to their website where you can buy all their awesome stamps and dies:

Goldilocks and the Three Bears Hello Card

Hi Everyone,

I wanted to share this card I made for the Avery Elle Kraft Challenge - although in the end I missed the deadline for submission, (the whole different time zone thing got the better of me…oops!) I didn't really have anyone in particular in mind when I made it, I just wanted it to be fun and cute.

I started with a 5x7 card base which I made from Neenah Desert Storm Cardstock. I then layered a piece of polka dot patterned paper from a Stampin' Up Saleabration freebie from this year. The centre piece of the card was made using more Desert Storm cardstock and pattered various shades of green patterened paper from the Amy Tan Yes Please collection. I used the Xcut Woodland Shadowbox Dies to create the layers of the forest scene. I separated the layers with foam tape to create dimension. I then used the sentiment, characters, toadstools and tree stump stamps from the Avery Elle Red & Goldie stamp set. I stamped them in Black Licorice Hybrid ink from My Favourite Things.

I stamped the three bear figures onto Desert Storm cardstock and coloured the mama and papa bears in a darker shade of brown with Spectrum Noir coloured pencils, blending solution and paper stubs. I coloured the cheeks and ear tips of the baby bear pink in the same way and added freckles with a Uniball white gel pen. I used the moustache, top hat, tie and bow stamps from the Mama Elephant Honey Bunny stamp set to accesorise each of the bears and fussy cut each of them. The goldilocks, toadstool and tree stump were stamped, coloured and fussy cut from Neenah Solar White cardstock in a similar way. I adhered them to the card with silicone glue. The sentiment was stamped in Stampin' Up Crisp Cantaloupe ink.


I used my Zig Wink of Stella clear brushpen and Ranger Glossy Accents to highlight certain areas of the card such as the toadstool and sentiment. Finally I adhered various sequins for extra sparkle. I used 6mm and 4mm Sparkling Clear sequins from Pretty Pink Posh and 8mm salmon pink ones from my stash.


To create the inside of the card I first used the Hero Arts Galaxy wood block stamp and Stampin' Up Pool Party ink. I then used another cute bear image form the Avery Elle stamp set to complete my card.


Sunday, 10 August 2014

Under the Sea Pop-Up Card


Hi Guys! 

So, my card this week is another pop-up (definately my favourites to make!) and I decided to go for an under the sea theme. My inspiration for the card was the Make the Day Special challenge for the Month of August. I used the blues, reds and oranges from colour pallete A as the basis for my design.


Firstly I started with a Papermania white note card. For the inside of the card, I adhered patterned paper from the Basic Grey Fresh Cuts 6x6 paper pad - one had a wave design and the other was a coordinating blue watercolour pattern. The layers for my pop-up design were created using acetate. I used Spectrum Noir pens in several shades of blue and aqua to create a wavy pattern on the acetate, and then I drew small circles onto this with the blender pen to create the look of bubbles. Lastly I flicked white ink over the acetate to create the look of more bubbles. I used the the Mama Elephant Lanscape Trio die to die cut three layers of acetate at different heights. Next, I stamped images from the Paper Smooches Surf and Turf stamp set onto Neenah Solar White card stock with `memento Tuxedo Black ink. I coloured the images using Spectrum Noir pencils and blendinh soluion and added freckles with a Uniball white gel pen. I fussy cut the imges and adhered them to the acetate layers using silicone glue for extra dimension. I cut sea weed from a peice of green chevron paper from the Dear Lizzy Daydreamer 6x6 pad and adhered this to the acetate, also with silicone glue. Next, I used red line tape to adhere the acetate to the card. I added sequins from my stash and a sentiment, also from the Surf and Turf stamp set and the inside of my card was complete.


These pictures shows the layers of acetate in my design. The pop-up mechanism is created using small peices of acetate as spacers between one layer of acetate and the next, meaning that when you open the card the layers pop-up too.


I kept the front of my card simple, as I always do with my pop-up designs. I used a piece of watercolour paper and Tim Holtz distress inks in Salty Ocean and Peacock Feathers to create the watercolour effect in the corner. The sentiment is from the Surf and Turf stamp set by Paper Smooches. I used Versafine ink to stamp it onto Neenah Solar White card stock. The whale image was also from the Surf and Turf stamp set and I coloured it with Spectrum Noir pencils and blending fluid. I adhered the sentiment and image over the watercolour using foam pads to create dimension. Finally I added a couple of sequines from my stash to complete the look. 


I would like to take part in the Make the Day Speacial August challenge (colour scheme A):


Saturday, 2 August 2014

Butterfly and Woodgrain Birthday Card

This little card, which I made for a friends 30th birthday, was pretty quick to make but I'm really pleased with the results. The design is inspired by some Ikea wall art I have hanging in my bedroom. I started with a Hobbycraft 5x5 white notecard and layered on a peice of patterned paper from one of my favourite 6x6 paper pads, Fresh Cut by Basic Grey - I just love the vibrant lime green and pink tones in this paper! I used the scallop cartridge from my American Crafts trimmer to create a subtle decorative edge. Next I cut a piece of Neenah Solar White cardstock to size and ran it through my Cuttlebug in a Couture Creations woodgrain embossing folder. I then used the Bitty Butterfly and Elegant Butterfly punches from Stampin' Up to punch shapes from the embossed cardstock. Initially I adhered it to the patterned paper, without the butterflies, using foam tape to create dimension. Before attaching the butterflys into the punched spaces, I gently shaped them with my fingers to give them more movement. I adhered the butterflies with Dovecraft silicone glue, ensuring I allowed a sufficient amount of adhesive to sit under each wing, helping to keep the wings in a flying/fluttering position. The sentiment, from the Stampin' Up Label Love stamp set, was stamped with Versamark ink and embossing powder from American Crafts, in a colour called Powder. I then punched the shaped label using the coordinating Stampin' Up Artisan Label Punch. I again used foam tape to adhere this to my card. Finally, I used several sequins in coordinating colours to complete this pretty card. The pink and peach sequins are from the Neat & Tangled Pixie Dust sequin mix and the remainder are from a selection in my stash.


I really love it when I'm able to coordinate the inside of my cards with the design on the front. To create the sentiment below I used a blue/green ink from Stampin' Up called Pool Party and a peachy pink ink called Blushing Bride, also from Stampin' Up. I stamped 'happy' and 'birthday' directly onto the notecard using the Winnie and Walter The Big, The Bold and The Happy stamp set. The 30 was stamped using a Hobbycraft Script alphabet set.  Next I used the banner and 'celebrate in style' stamps from the Bloomsies stamp set by Mama elephant. I fussy cut the banner and adhered it to the card with foam squares. The design was completed using sequins and a Bitty Butterfly punch from the same Fresh Cut patterned paper as before.